Creating an Event
Association staff can create events in re:Members AMS and staff can allow users to register for these events. A large number of configurations are possible when creating an event, including but not limited to:
-
virtual and on-site events,
-
multiple price levels for different types of customers,
-
sessions within an event,
-
insertion of custom fields to track unique data about a specific event or fields to track data on events in general,
-
registrant badge configuration,
-
and much more.
Event setup starts with the creation of an Event Record, either by creating a new event record or by copying an existing one. In creating an event, keep in mind that events are simply another type of product and follow all the typical "rules" of product creation. However events do allow for a much greater variety and range of options than most other products in re:Members AMS
Adding a New Event
-
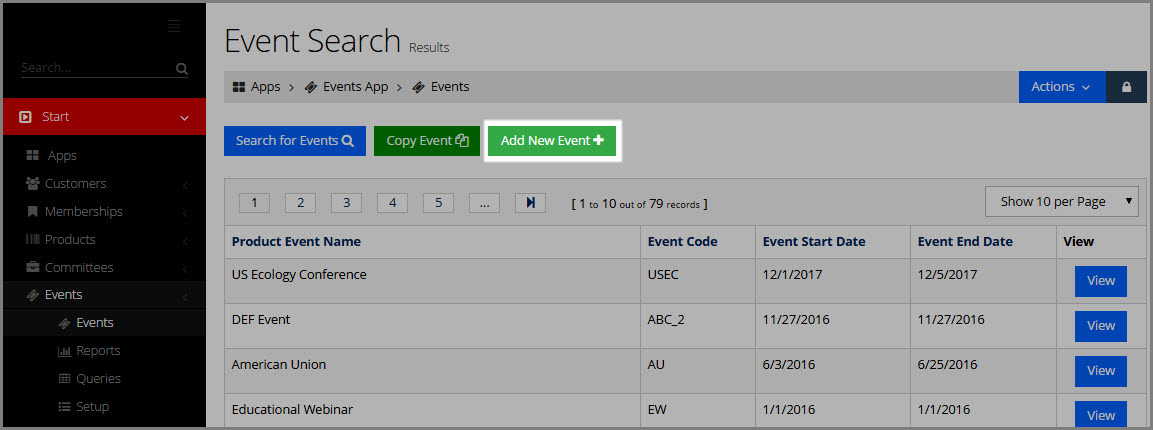
Navigate to the Using the Events App > Events.
-
Click the Add New Event button.
-
Complete all required fields in the Add New Event form.
Note: Because the essential setups for events are the same as in the creation of any other product in re:Members AMS, see the article, Creating a New Product for detail on these common settings.
-
On-Demand: This option allows the creation of an event without the requirement of a Start Date or End Date. This is particularly useful for clients who wish to integrate with an outside LMS. This setting can be used to allow users to register for an LMS session via an re:Members AMS event which doesn't expire.
Enabling the On-Demand setting removes fields related to venue, event date and time, and badge.
-
Format: The format of the event. Options for this drop-down list can be created under Events > Setup—examples could include items such as "Webinar."
-
Virtual: For use with webinars and similar online-based events. If an event is flagged as "virtual," the option to set a venue will disappear from the Add Event form and badge options will not appear in the Event Record.
Note: Hybrid events—that is, events taking place at a physical location which also have an online option—are not currently supported in re:Members AMS. Configure events as either in-person or virtual.
-
Check Conflict During Set Up: When enabled, this setting causes the system to alert staff during event configuration if a session, room, or speaker is committed to conflicting or overlapping time slots.
-
Venue: If one or more venues was created under Events App > Setup, begin entering the venue name in this quick search field to set that venue as the event's location. If the venue was not yet created under the Events App > Setup, create it here by clicking the green Add icon next to the Venue field.
-
Start and End Date & Time: This is the start and end date and time of the event itself. The Start and End Date & Time appears in the event storefront and in the Event Checkout Wizard.
-
Time Zone: The time zone in which the event takes place.
-
Limit Capacity: Clicking this check-box allows you to specify a maximum number of attendees for the event.
-
Capacity: If the Limit Capacity option is enabled, enter the maximum capacity here.
-
Waitlist Policy: Specify how the system should behave once the event's maximum capacity is reached. Staff have the following options in this drop-down field:
-
Do Not Allow Waitlist
-
Allow Waitlist and Collect Full Payment
-
Allow Waitlist Without Collecting Payment
-
-
-
Allows Group Registrations: Click this check box to enable group registrations for the event being created. Group registrations include scenarios in which a group of individuals that are all related to the same company register as a group under that company.
Note: This functionality is different from Guest registration. Guest registration allows registrants to bring a limited number of guests, and it's intended to be used for individuals such as a spouse or child. Guest setup can configured once the new event has been saved by editing the Event Record.
-
Group Registration Pricing Based On: If Allows Group Registrations is enabled, the Group Registration Pricing Based On setting allows you to choose how group registration pricing should be determined. Options include:
-
Organization: Pricing for group registrants is based on the price attributes affecting the organization the group is registering under. All registrants in the group will have the same price.
-
Individual: Pricing for group registrants is based on price attributes affecting them (as individuals). Prices may vary between individuals within the group.
-
-
-
-
Click Save to create the Event Profile, or Save & Add New to save the event and create another.
Note: Many options created during event setup can be edited from the Event Record > Details tab. Use menu options General Info, Additional Info, and Event Dates.
Once the Event Record has been created, set up remaining details about the event. For more information on setting up parts of the Event Record, see the following help topic(s):
Copying an Event
Existing events in re:Members AMS can be copied. This feature is especially useful in cases where you are creating a new event with many similar setting to an existing event. Copying the existing event allows you to preserve most of those settings then to simply update necessary settings in the copied event.
What's included in the copied event?
Tip: Clients with recurring events may want to create a "template" event containing essential information that they can use as a starting point each time they want to create that type of event.
To copy an existing event:
-
Navigate to the Using the Events App > Events feature.
-
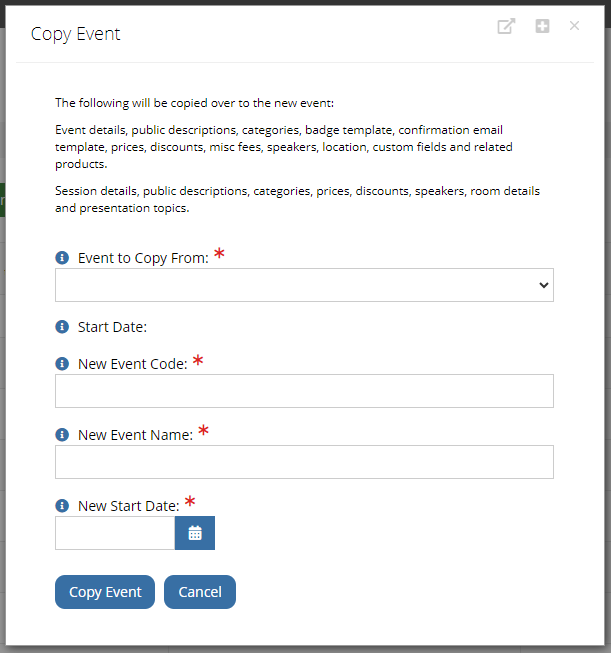
Click the Copy Event button. In the Copy Event form:
-
Event to Copy From: Choose the event to be copied.
-
New Event Code: Assign the new event a unique code.
-
New Event Name: Assign the new event a name.
-
New Start Date: Designate the new event's start date. The copied event's start date will be listed above for reference.
-
Click Save.
-
The original event will be copied, and a new event will be created. Open the new Event Record and proceed with updating event information, including prices, sessions, etc.